If you find these tutorials useful, Please consider making a donation.


 .
.
We look at the Disks (Manage Drives and Media) program.
This program will show the different partitions on a disk drive as well as allow us to add and delete partitions.
Please be careful when you use this program, it is very easy to accidentally delete something you did not intend to delete.
The Disks program will give you information about the disk drives attached to your system, like your CD/DVD Drive and your hard drive, as well as any flash drives you might have plugged.
We see how to mount and un-mount the drives with this program, We see when the disk is mounted, we can read and write files to that disk, when it is not mounted, we can make changes to the unmounted disks partitions.
We talk about reformatting the drive using the "Quick" option and how it only tells the operating system there is no file, but the files still remain on the disk and that overwriting the existing data with zeros will take a little more time, but it does a better job of deleting your files.
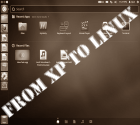
Partitioning the disk allows us to install two different operating systems - we see where the Windows XP partition is and where the Linux partition is.
A flash-drive is added and reformatted (losing all data on that flash-drive) into 2 partitions, we talk a little about the different file types FAT, NTFS, and Ext4 and show how to format the different partitions with different file types. We give each partition a name.
Then we delete the partitions (losing everything on that partition) and reformat that flash-drive into a single partition.
Connecting a Network printer to a Linux Mint Mate computer.
I go into into Menu - Administration - Printers and we click the add (plus sign).
We see our printer is found on the network right away and we select a connection.
We then look at adding a Printer Name, adding a Description, and a Location.
I call this printer Charlie_Brown. And we look at how to change the Name to Lucy - then Change it back to Charlie_Brown.
We then try scanning something in using the Simple Scan program.
The scanner is connected properly, so we check the HPLIP software and add HPLIP-GUI program.
Running HPLIP Toolbox, tells us our scanner is missing a proprietary plug-in and asks me if I want to add it - I choose yes and add it - and the scanner works.
I delete the HPLIP-GUI program to remove the HP logo from my Notification Area and scan in something once again to prove my scanner still works.